| |

5 electrifyingly
easy steps to a shockingly cool image
Download
this tutorial's .psd file
| Step
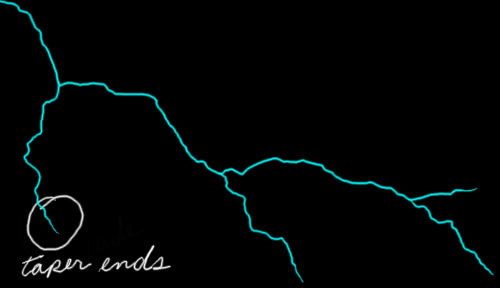
1.) My image is 500 x 288 pixels, but you can use any
size you like. Begin by filling the background layer
with black, then make a new layer and use a 3 pixel
paintbrush and light blue color (in the SWATCHES tab
it's on the top row, 4th from the left) and paint irregular
lines like a bolt of electricity. After my bolts were
painted, I took a small eraser and tapered the ends
of the bolts to make them look a bit more realistic.
Sc00p suggests using the smudge tool to "pull"
the tapers on the ends. Good idea...thanks Sc00p. ;) |
| Step
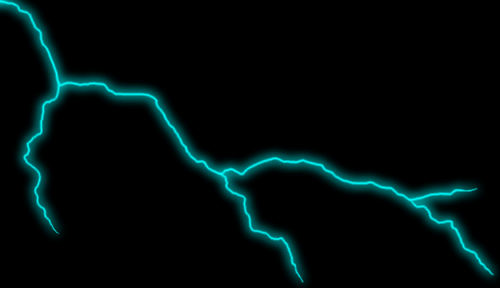
2.) Next, duplicate the layer with the blue lightning
bolts on it and apply a gaussian blur of 5 pixels (and
make sure that the layer you're blurring is below
the un-blurred layer). As you can see, the blurred layer
is going to give us a nice glowing effect to our lightning.
You can also see that the blurred layer is pretty faint,
so duplicate it 3 times and merge them together and
you'll have a nice glow like the image below. |
| Step
3.) Go back to your lightning bolt layer and open
the HUE/SATURATION menu and adjust the LIGHTNESS slider
to +75. This will take out some of the blue and brighten
the bolt. I use hue/saturation out of habit...the brightness/contrast
control should give you the same effect. |

| Step
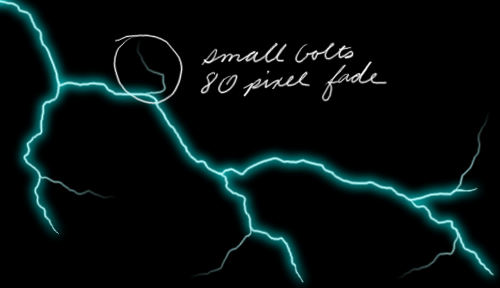
4.) Our lightning is already looking good, but this
little trick will really add realism. Using a 2 pixel
paintbrush with the FADE option setting at 80 pixels,
paint in some tiny bolts. To be sure you have the correct
color, press the ALT key and drag the paintbrush over
the main bolt. This will set the foreground color to
whatever the pointer is over at the time. At this point
we can stop if we want, but I'll show you one more trick
that you can experiment with... |
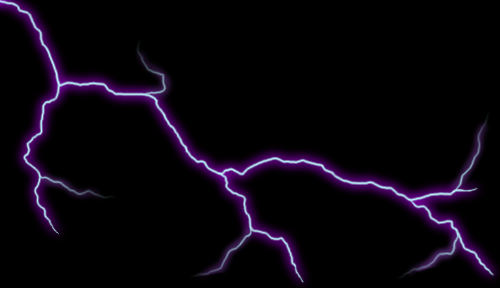
| Step
5.) Use the HUE/SATURATION slider and adjust for +105.
This will give the glow an eerie purple color. Using
the airbrush tool, carefully paint in a bit of glow
behind the small bolts you made in step 4. Press the
alt key while dragging the airbrush over the purple
to set the correct color. Our image is now done, but
you can experiment with different colored glows, and
feel free to add more bolts if you like. And what's
best about this method is that you did it without a
3rd party plug-in, and you have complete freedom to
edit any of the layers. |

|